To Installing IBM InfoSphere Information Server Download the installation image files from Passport Advantage.
1.1 Create a new folder on your C drive in which you will move over the Information Server client
exe. and copy all the IBM’s Infosphere Suite files paste to folder.
1.2 Next unzip InfoSvr_Client_v8.5_Win.zip, InfoSvr_v8.5_FP1_WinSvr_32_64.zip, is-suite-8.5.0.284.zip
within. Make sure you keep the same folder names of the sub folders. Click Windows Start then search for “CMD”
Once CMD opens type the following cd C:\Foldername\InfoSvr_Client_v8.5_Win\is-client
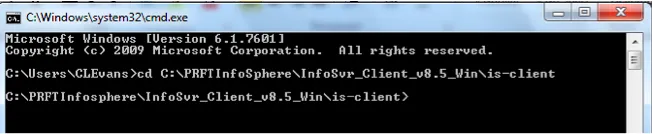 Once you have changed your directory within the command prompt window, you then need to execute the setup.exe file. To do this type setup.exe within the CMD window.
 This will Click off the installation
 Image Removed Image Removed Image Added Image AddedYou may get a Windows Block popup. Make sure you allow access to the Java Launcher.
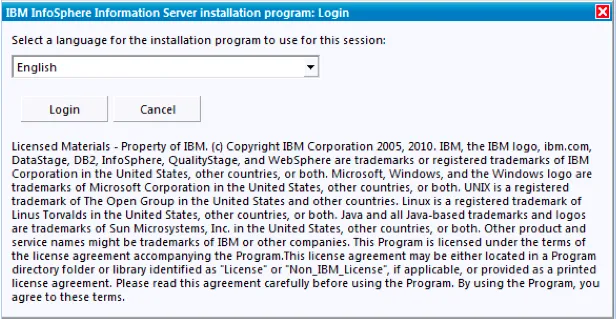
Once the installation Clicks off the following dialog will box will appear.
Please select the language then Click the “Login” button
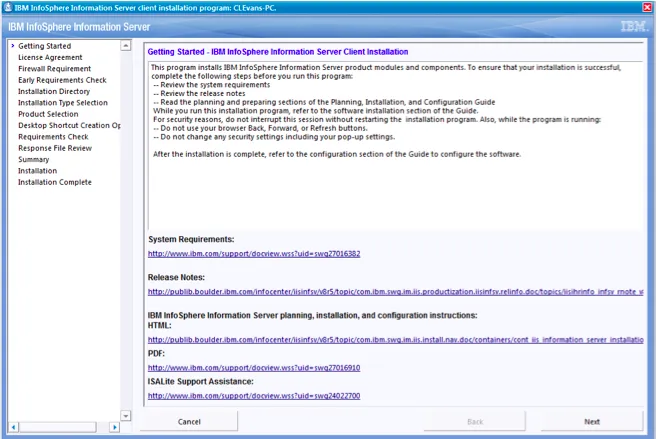
 Once you Click the “Login” button the following window below will appear, please Click Next.
 Next the Software License Agreement will appear, please read and check the
“I accept the terms in the license agreement” then Click the “Next” button.
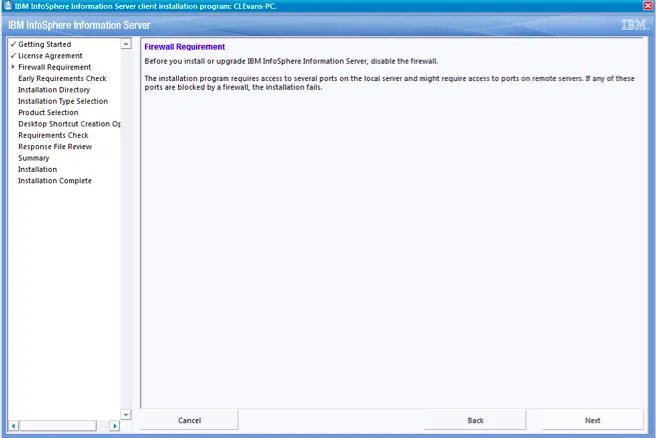
Then see a Firewall Requirement screen pop up, Click the “Next” button.
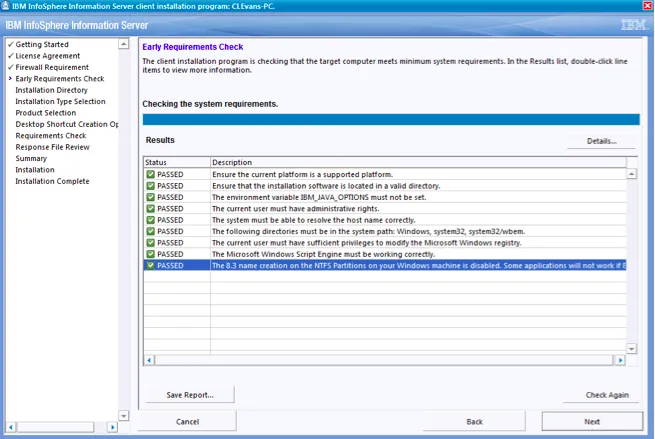
 Next the install will validate that you PC meets all requirements for the install.
If you “PASSED” all checks and everything is green then you can Click the NEXT button.
 Once the check up is complete, a prompt will appear in regards to the install.
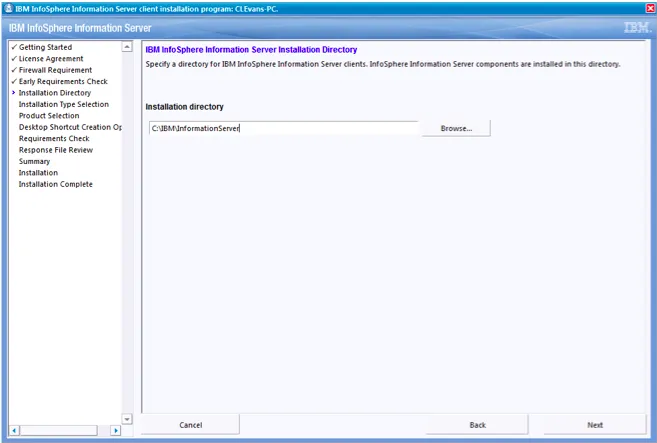 Make sure the installation directory is “C:\IBM\InformationServer” This should be the default.
Click NEXT
Select “New Installation” then Click NEXT
 Image Removed Image Removed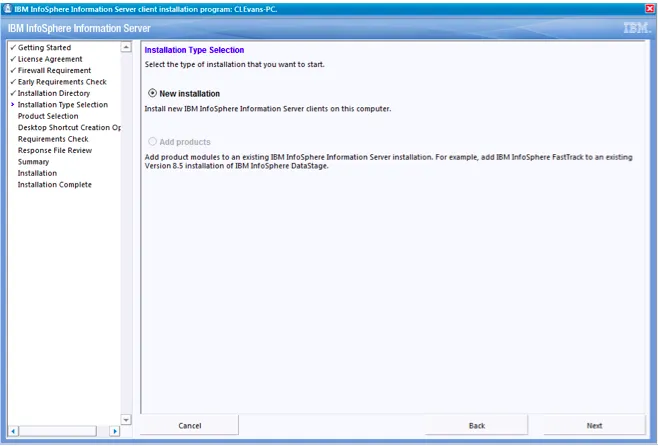 Image Added Image AddedSelect a default Language and select all the IBM Infosphere Suite products, then Click NEXT.
 Image Removed Image Removed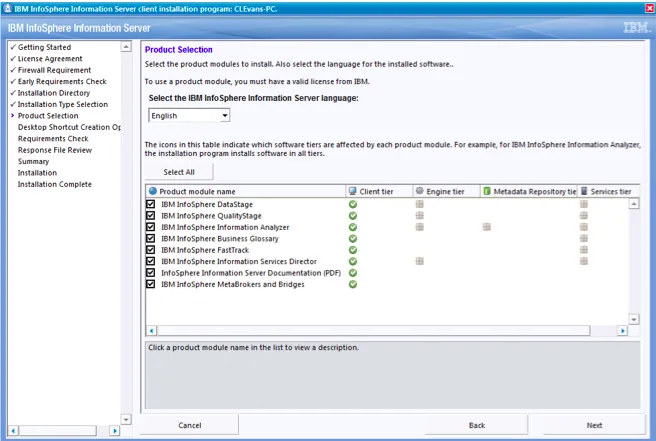 Image Added Image Added An option will appear to install shortcuts on your desktop.
Keep checked if you want the shortcuts on your desktop. Click NEXT 12. InfoSphere will validation your PC meets all system requirements.  Image Removed Image Removed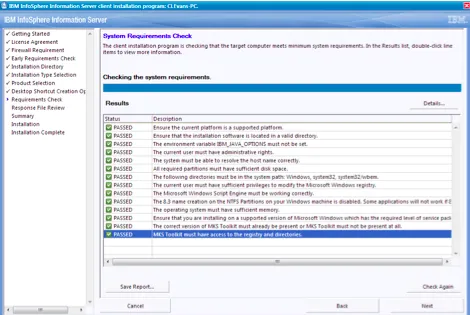 Image Added Image Added If everything is set to “PASSED” click “NEXT.” For any checks that have “FAILED” you will have to fix
the issues before moving forward. 13. InfoSphere will ask if you want to install, press the NEXT button. Make sure the Install IBM
InfoSphere check box is selected. In addition, your response file location should have defaulted to
C:\IBM\InformationServer\response.txt. You can change this if you like.  Image Removed Image Removed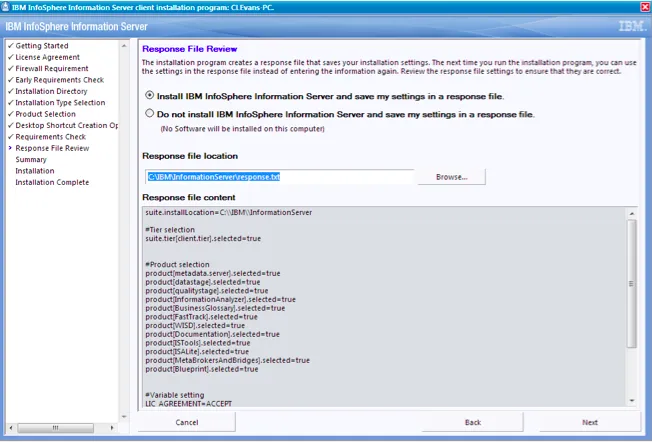 Image Added Image Added 14. Infosphere will list out all the products it will be installing.
Click INSTALL if you are ok with all the Infosphere applications in which will be installed.  Image Removed Image Removed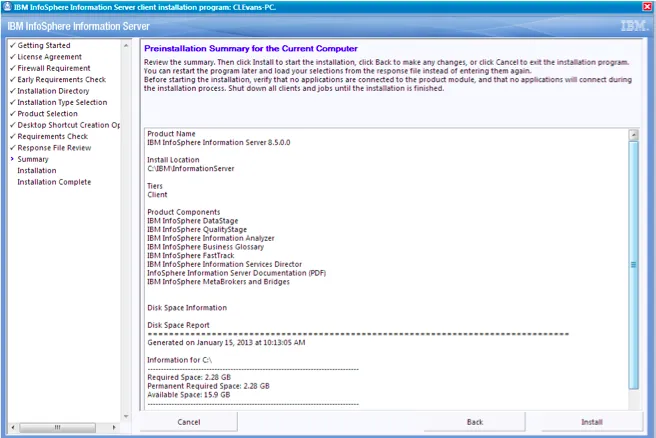 Image Added Image Added 15. Please note this install will take a while.
Install should complete and a summary of everything installed will appear. Click FINISH.  Image Removed Image Removed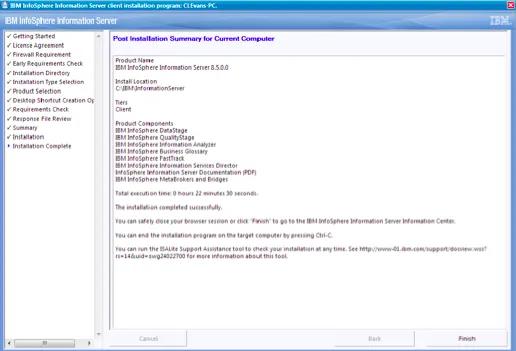 Image Added Image Added 16. The following help screen will appear, go back to the CMD window to close out and complete the install session for Infosphere. Press CTRL+C to close the command window, and close the help doc. 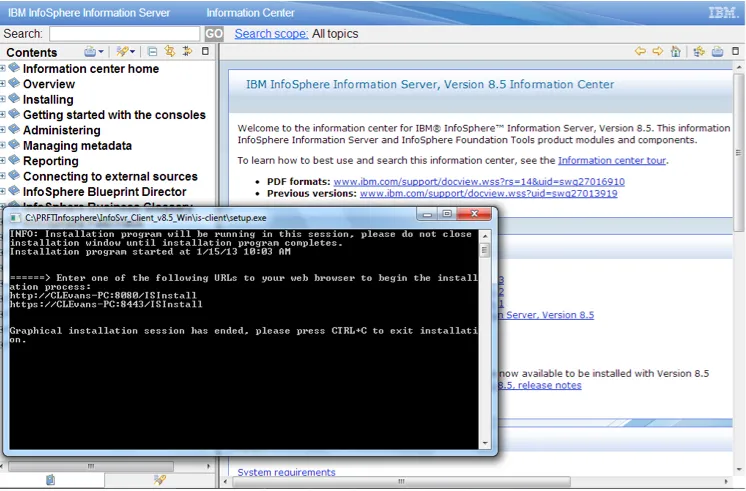 17. Installation is complete. Verify the install.
Go to the following folder/file C:\IBM\InformationServer\Version.xml
If the following XML opens and you see “Success” within the status, your installed as installed
correctly.  Image Removed Image Removed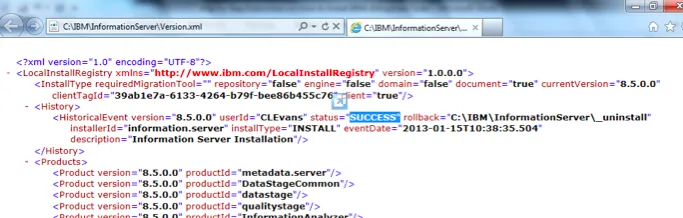 Image Added Image Added Close the following XML
This will complete the install of the Infosphere package suite applications. |